Dillon XL 650/750 Spent Primer Catch Upgrade Installation Instructions.
Please read through all of the steps before beginning.
|
To download these instructions in PDF form CLICK HERE (to Save File, right click the link and select "Save Link As") |
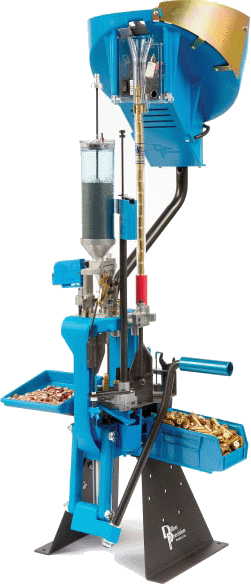
Images shown are of the X650 (expect were noted) but installation is the same for the XL750
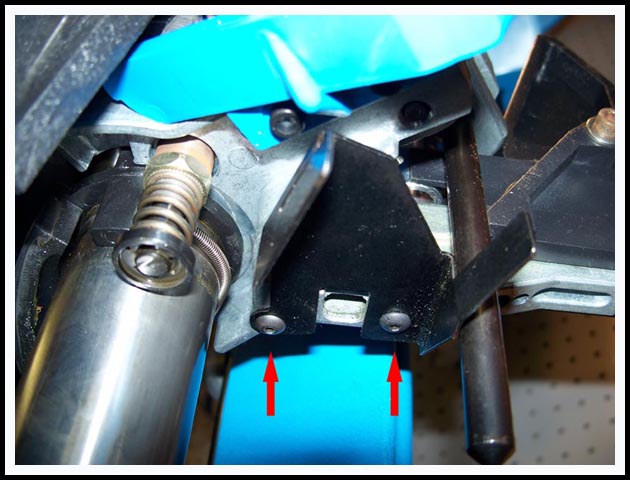
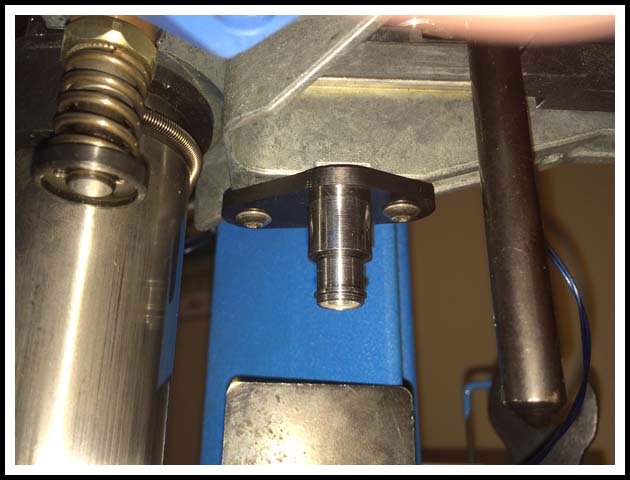
To Start you will be removing the Stock Spent Primer Cup Bracket from the platform. Using a 3/32 Allen Wrench remove the two screws that hold the stock metal Spent Primer Cup Bracket to the platform. This is easier done with the platform in the raised/handle down position.
|
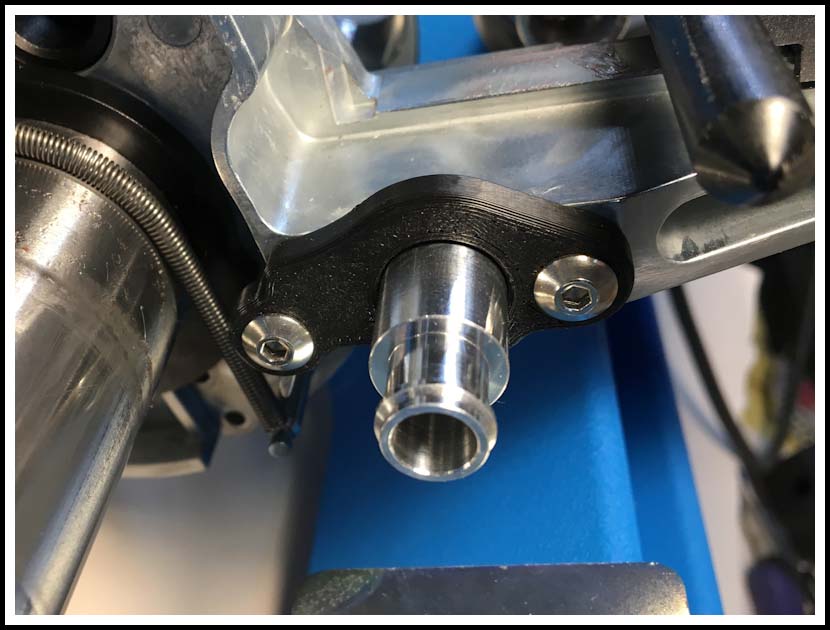
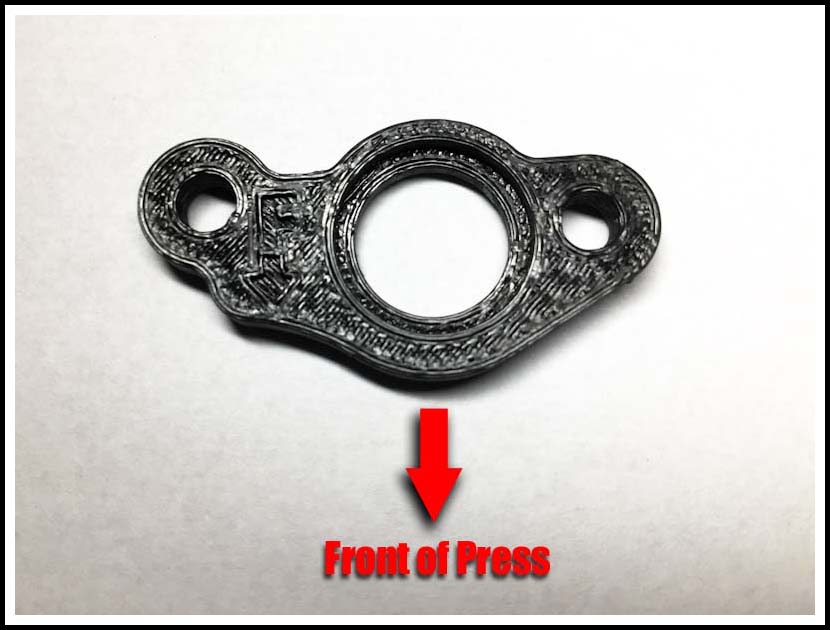
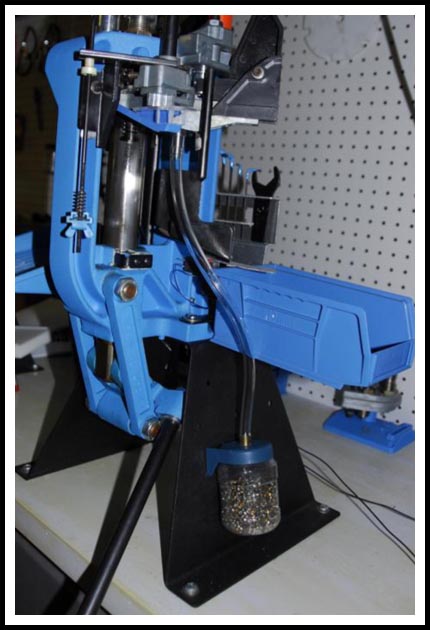
XL650 Bracket Position
Then using the supplied screws install the new Bracket and Funnel in the Position shown above. The round end of the triangle bracket should face forward. (If you put this on backwards it will hit the bullet chute and may break.) Start one screw in the first hole but do not tighten it until you get the second screw started. This will help to align them without cross threading either of them.
|
XL750 Bracket Position
|
XL750 Bracket Position
There is a F with a arrow on the bracket but it's hard to see.
(This picture shows the top surface of the bracket and it mounts against the platform.
|
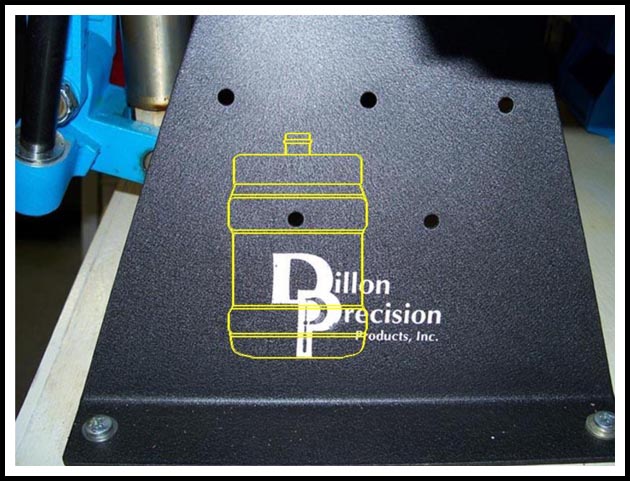
Next the new Spent Primer Cup will be mounted to your right side Strong Mount in the area shown above.
The Cup location shown here is for the RL550/XL650 Strong Mount which measures 8 ½” high, Dillon now has a XL650 Only mount which is only 6” High. If you have the 6” XL650 Only mount you will need to determine the proper location of the cup for your mount, select a location similar to what is shown above. The hose length included is the correct length for the 8 1/2” mount only, you will probably need to trim the hose to the correct length dependant to the location you have chosen. Trim the hose only after you have mounted your Cup.
|
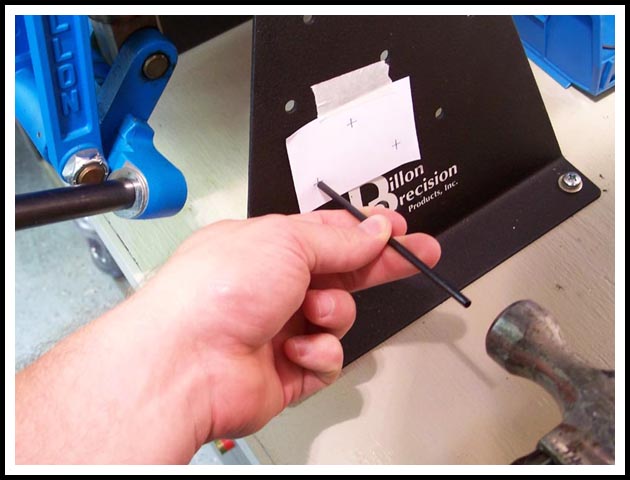
Tape the Template to your Strong Mount, aligning the two bottom marks in line and centered with the lower left hole of your Strong Mount. There is a black dot on the template (not shown here) that should align with the hole in the strong mount. You can use a flashlight shining from the back side to help you align the dot to the hole.
Again, the alignment shown above is for the duel use RL550/XL650 (8 ½ inches high) Mount only. If you have the lower 6 strong mount the holes already in your strong mount may be in different positions so the placement of your temple may need to be modified.
|
Once you have determined the correct location of your template using a hammer and a punch, center punch each of the 3 marks on the Template.
|
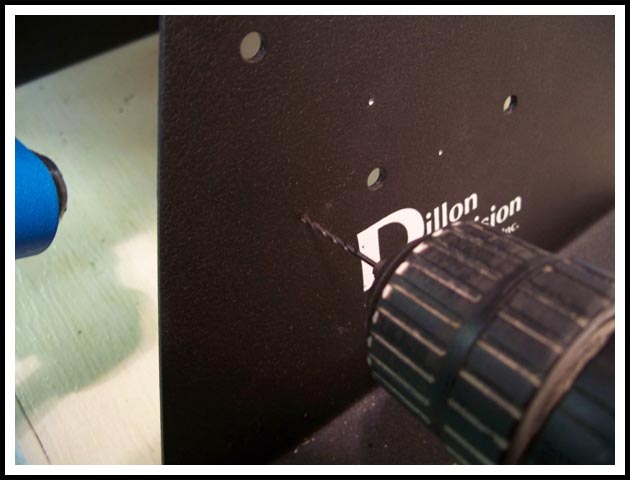
To keep the a larger Drill Bit from walking while drilling, I like to start the holes with a smaller drill bit such as a 1/16” bit, the smaller bit should stay centered better in the punch mark you just made.
|
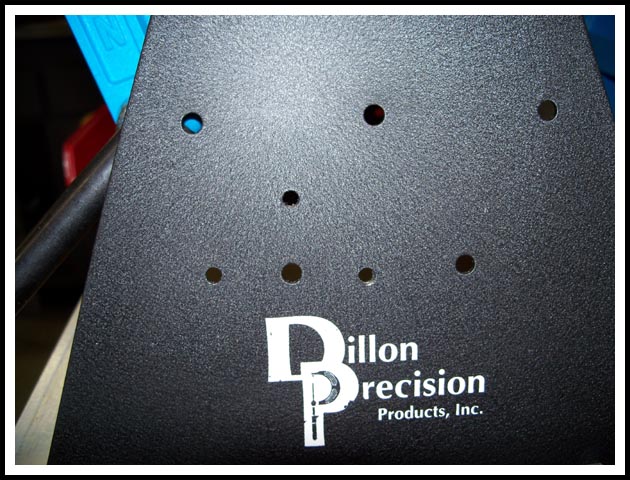
Next enlarge the 3 holes using a 13/64 Bit (5mm is closest for you metric guys). You can touch up these holes with a little paint if you want. I just spray a little spray paint on a plastic bag until it puddles and then use a Q-tip as a brush to apply paint to the holes, this will keep them from rusting.
|
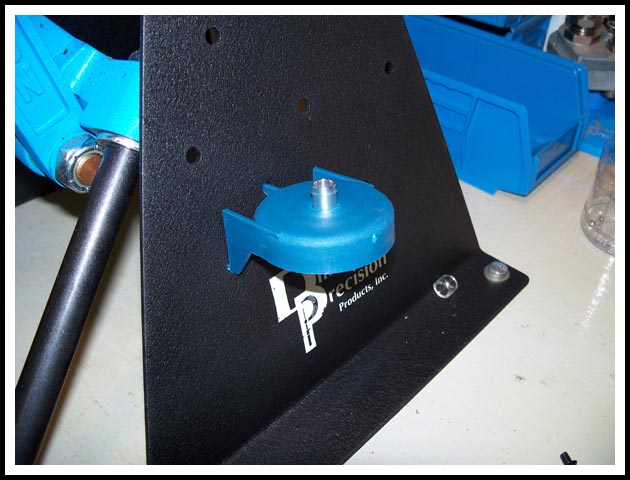
Next you will be installing the lid of the New Spent Primer Cup, (REMOVE the Cup from the Lid before installing the lid onto the Strong Mount or the legs will bend and break off.) Insert the bottom two legs first then lightly press the top leg downward to allow it to snap into the hole. Do Not over force it because the plastic legs are very fragile, once the Lid is mounted removable is not recommended. After the Lid is mounted to the Strong Mount you can then screw the Cup back onto the Lid, always hold the Lid while removing or installing the Cup to keep pressure off of the legs.
|
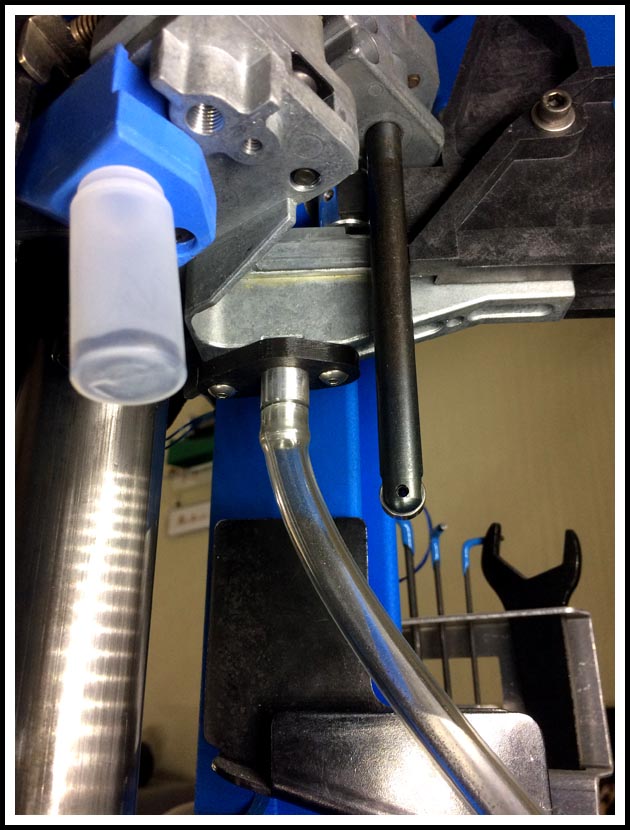
Next the free end of the Hose will be installed on the end of the Funnel.
|
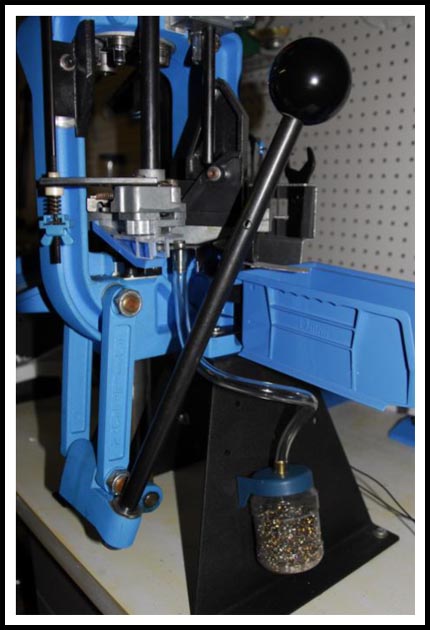 .... ....
You are going to want to put a bit of a twist in the Hose before installing it on the Funnel. To form the twist turn the hose 180 degrees before installing it on the top fitting. This twist will keep the Hose from kinking as the platform is lowered, instead the Hose should form a coil as shown in (Pic.1). As the platform is raised the Hose will stretch out to be almost straight allowing the primers to fall into the New Spent Primer Cup. (Pic. 2)
|
Enjoy, you should now never have to pick spent primers off the bench or floor again. If you have any questions, comments, or problems please contact me at stevethone@comcast.net
|